Installation
June 29, 2024 at 4:56 AMRequirements
To install Next Active Directory Integration you need at least WordPress 5.6 and PHP 8.1.
Although only tested with Apache 2.2 and 2.4 Next ADI should work with all other common web servers like nginx and IIS.
Next Active Directory Integration requires a few PHP modules to be enabled. Please verify in your php.ini that the modules ldap, mcrypt and mbstring are activated. But it is very likely, that mcrypt is already enabled and not listed in the php.ini. If you are planning to use encryption for your LDAP connection - which we highly suggest - you although need openssl to be enabled.
Open your php.ini, located e.g. in c:\windows\php.ini or your PHP installation directory and enable the extensions by removing the prepending semicolon (“;“). If the “extension” entries do not exist, you can simply add them:
;;;;;;;;;;;;;;;;;;;;;;
; Dynamic Extensions ;
;;;;;;;;;;;;;;;;;;;;;;
; ...
; required by ADI 2.x
extension=php_ldap.dll
extension=php_mbstring.dll
; required by LDAP/S and STARTTLS
extension=php_openssl.dll
After you have saved the changes you have to restart your webserver.
Migration from ADI 1.x to Next ADI 2.x
Please read the Migration section carefully.
Installation in WordPress
Next ADI can be easily installed from the WordPress Plugin Directory
It is also possible to download the latest version from https://downloads.wordpress.org/plugin/next-active-directory-integration.zip and unpack the folder to your wordpress/wp-content/plugins directory.
Developers can clone the Git Repository inside their wordpress/wp-content/plugins directory and download the dependencies with composer.
Single Site
-
Visit your WordPress blog and login into your WordPress dashboard as Administrator
-
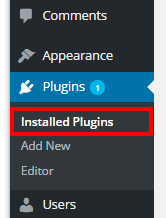
Click on the Plugins in the left the navigation bar

-
Activate the Next Active Directory Integration plug-in

Network installation
- Visit your WordPress network dashboard as Super Admin
- Click on the Plugins link in the left the navigation bar
- Activate the Next Active Directory Integration plug-in. In a WordPress network installation Next ADI should be Network activated.
You can enable/disable Next ADI for specific blogs by using the Profiles feature of ADI. It is not possible to activate Next ADI for a site inside a network.
Next steps
Congratulations! You successfully installed Next ADI.
Please continue to read the Security considerations section.